This is the second in my series about my bullet journal, my previous post was an introduction to the basics and also showed the journal I choose to use.
For the main pages of my journal, I have a lettering book that I like to use for the titles. Although for this journal I am keeping things simple, I still like to add a small something to make the journal look nice.
The first page I create is my key. I begin with the title for the page for which I use my lettering book and I also like to add some colour. This way, the pages always have a small something creative and colourful, no matter the rest of the page.
 I have a few bullets I use for my journal, but you can use whatever you want. I like to be able to distinguish tasks from events from appointments and an assignment bullet point is useful for my uni work. Likewise, a point that I can add so I can see my deadlines is great for keeping track of work. The dash for a note is helpful for when I have an idea or there is something that I just need to get down on paper, perhaps about a task or event from that day. The points for TV, book and film are great for scheduling a release date or for noting activities I did that day.
This is quite a basic page, but I’m fine with that as it is necessary for the journal. To create my journal, including this spread, I am using a black BIC ballpoint pen and Mildliner highlighters.
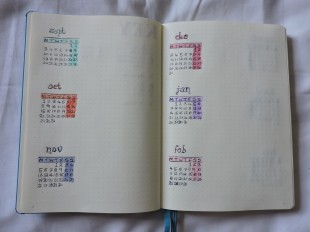
 The next two double spreads are for the future log. This is a really useful part of the journal as it provides an overview of the year, is the place to schedule bigger tasks or events, and is great when you get asked about something months in advance and have not drawn up that monthly spread yet. I like to have the small overview of the month on the side of the page and I colour this in the colour that I will later use to accent the monthly and weekly spreads for the month.
These are the first necessary pages for a bullet journal, my next post will detail the following pages that I have personally chosen to add in.
Still to come:
- My chosen pages – the pages I choose to add to the beginning of my journal
- The Month – designing monthly and weekly spreads
- My tips – advice on bullet journaling and final thoughts
Previous posts:
- An Introduction – introduction to bullet journaling, how I want this journal to be and which journal I use
